


 New Code Sent!

7 Steps to Clean a Refrigerator | Step-by-Step Guide
Every household needs to store fresh and frozen food safely in a clean environment. This means you must keep your refrigerator clean and organized at all times. By doing so, you can find what you need more easily and help maintain the freshness of dairy products, meats and produce.
This guide explores how to clean a refrigerator and offers the steps to keep your kitchen appliance well-organized and tidy.
WHY YOU SHOULD MAINTAIN A CLEAN REFRIGERATOR
Your kitchen is where you make memorable meals and spend time with your family and friends, so you want to keep the space fresh and pleasant. Part of this process is to clean your refrigerator regularly.
A refrigerator’s standard operation involves air circulating between the refrigerator and freezer compartments, providing odours the opportunity to spread from one to the other. By thoroughly cleaning your refrigerator, you can help with the following:
Remove odours
Keep each compartment organized
Help prevent mould spores that can cause food spoilage from developing.
You also want to clean your refrigerator’s exterior in addition to the ice maker regularly.


FREQUENTLY ASKED QUESTIONS ABOUT REFRIGERATOR CLEANING
Review these answers to some of the most common questions about how to help maintain a clean and odourless refrigerator.
HOW FREQUENTLY SHOULD I CLEAN MY REFRIGERATOR?
It’s recommended to clean your refrigerator every three months. This can help keep it smelling fresh and help maintain a clean environment for your food and beverages.
CAN I USE BAKING SODA TO CLEAN MY FRIDGE?
Yes, baking soda can safely remove odours from the inside of a fridge and help eliminate messes. Remember, baking soda should never be used to clean the exterior of a stainless steel refrigerator.
SHOULD I CLEAN MY FRIDGE WITH VINEGAR?
Yes, using white vinegar is a natural way to clean your refrigerator. It can help remove stubborn grime and grease. Using a solution made of water and vinegar is safe and can effectively clean your refrigerator.
HOW TO CLEAN A REFRIGERATOR
Use these tools and supplies to help sanitize your refrigerator.
Supplies
Hot water
Garbage bags
Mild detergent
Vinegar
Baking soda
- affresh® stainless steel brightener (optional)1
Tools
Clean towels
Large container or bucket
A clean sponge or soft cloth
Toothbrush (optional)
1. affresh® brand products and the recommending brands’ products are all owned and distributed by Whirlpool Corporation.
TIP:
Never use harsh or abrasive cleaners on the interior, plastic parts, door liners or gaskets of a fridge.
Cleaners to avoid include:
Scouring cleansers
Window sprays
Flammable fluids
Cleaning waxes
Concentrated detergents
Bleaches
Cleansers containing petroleum products

STEP 1. TAKE OUT FOOD FROM THE REFRIGERATOR AND FREEZER
Before starting, remove every item in your refrigerator and freezer. You need to store all perishables in a cooler or undercounter refrigerator. Throw away any expired items or old leftovers.
STEP 2.UNPLUG THE APPLIANCE
Unplug your refrigerator or turn off the circuit breaker to avoid wasting electricity as you clean it.
This is less of an issue if your fridge has removable shelves and drawers, but remember that you’ll be keeping the fridge door open for an extended period, which is a waste of electricity.
STEP 3. REMOVE STORAGE BINS AND SHELVES
If your fridge has removable shelving and drawers, remove them and place them somewhere safe. Refrigerator models come with various styles of drawers and shelves, so review your owner’s guide to learn which parts of your fridge are removable.
IMPORTANT: Covers and glass shelves are heavy, so be careful when removing these items to avoid dropping them.
STEP 4. WASH REFRIGERATOR BINS AND SHELVES
First, let the bins and shelves reach room temperature. Then, wash the bins with warm water, a mild cleanser and a sponge. You may be able to wash them in the dishwasher, but confirm this with your use and care guide before proceeding.
Generally, glass shelves and bins are dishwasher-safe. To be safe, it’s recommended to hand-wash them with mild dish soap and water.
IMPORTANT: Never clean covers or glass shelves with warm water when they are cold. This may cause them to break due to the sudden temperature change. Furthermore, they are fragile and can break from impact, such as bumping. Tempered glass is designed to shatter into many pebble-sized pieces and is challenging to clean. Please note that refrigerator shelves with under-shelf LED lighting are NOT dishwasher-safe.
STEP 5. HAND WASH REMOVABLE PARTS AND INTERIOR SURFACES
- Spray a non-abrasive, degreasing cleaner around your fridge’s interior to help kill germs, mildew and mould. Another method is to dampen a clean cloth or sponge in a solution made of either mild detergent and warm water, a mix of baking soda and hot water or white vinegar. Next, clean the door, walls and permanent shelves. You can use a toothbrush to remove any stuck-on grime or spills.
- Then, clean the interior and exterior of the built-in ice maker, if your refrigerator is equipped with one, and change the water filter, if necessary.
- After you’re done cleaning, use a clean towel to wipe the interior until it’s fully dry.
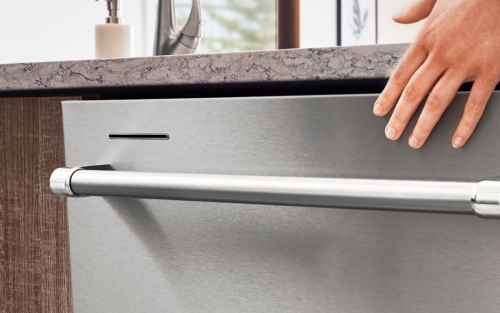
STEP 6.CLEAN THE EXTERIOR OF THE REFRIGERATOR
- To clean a fridge’s exterior, use a mild dish soap mixed with water to wipe down the doors, including the seals and handles. Then, dry it completely with a clean cloth.
- If you have a stainless steel refrigerator, try using affresh® stainless steel cleaner. All you must do is spray affresh® onto a clean microfiber cloth and then wipe the surface along the grain.
- If you don’t have affresh® stainless steel cleaner, dampen a non-abrasive sponge or soft cloth with dishwashing soap and water.
- You need to dry a fridge’s stainless steel exterior right away to help prevent water spots.
TIP: USE AFFRESH® TO RESTORE STAINLESS STEEL
Affresh® stainless steel cleaner1 is an effective method for stainless steel surface care. It helps remove rust and tackles yellowing and heat-induced discolouration. This versatile cleaner can help restore the immaculate shine of stainless steel ovens, refrigerators, range hoods, dishwashers and microwaves.
1. affresh® brand products and the recommending brands’ products are all owned and distributed by Whirlpool Corporation.
STEP 7. PLUG THE REFRIGERATOR BACK IN
After the shelves and interior are clean and dry, plug the refrigerator in or turn on the circuit breaker to restore power. Certain refrigerators may take up to 24 hours to reach their recommended temperature, so you may need to keep any perishable items in a cooler or another refrigerator. Before placing jars and containers in the clean fridge, give them a wipe with soap and warm water.

HOW TO CLEAN THE SHELF CHANNELS AND DRAWERS INSIDE A FRIDGE
Spills that occur inside your refrigerator may drip into the slide control of the crisper bins or shelves, causing them to stick. With heavy spills, you may also have to clean the frame with a soft cloth and mild dish soap.
Use these 3 steps to help clean drawer or shelf channels.
STEP 1. USE A SOFT CLOTH OR SPONGE AND WARM, SOAPY WATER
Warm water can help soften grime. For stubborn stains, make and apply a paste of baking soda and water and let it rest for a minimum of 10 minutes before trying to remove it again.
STEP 2. THOROUGHLY RINSE EACH CHANNEL
Use a towel to rinse off all soapy residue before drying.
STEP 3. DRY WITH A SOFT MICROFIBER CLOTH
Thoroughly dry the channels with a clean microfiber cloth,
Visit our Manuals and Literature page to download or view product literature for your KitchenAid® appliance.


5 STEPS TO CLEAN A SMELLY REFRIGERATOR
One of the best ways to help prevent odours from forming is to clean your refrigerator regularly.
Use these 5 steps to help clean a refrigerator with a pungent odour
STEP 1. TIGHTLY WRAP OR COVER FOOD OR PLACE IT IN A SEALED CONTAINER
Tightly wrapping, covering or using containers for leftovers can help reduce the chances of spills occurring or odours forming.
STEP 2. WIPE SPILLS RIGHT AWAY
Spills that sit for a long time are generally harder to clean. Immediately clean any spills or messes to remove the chances of them causing an odour or hardening.
STEP 3. CLEAN BOTH COMPARTMENTS MONTHLY
Make it a monthly routine to clean your refrigerator to help prevent odours from forming and grime buildup. How long this task takes depends on the size of your refrigerator, the kinds of foods you store and how you organize them.
STEP 4. ORGANIZE YOUR REFRIGERATOR AND FREEZER
A thoughtfully organized refrigerator can help ensure that food and beverages are accessible and visible and that leftovers aren’t hidden and allowed to spoil in the back corner of the refrigerator.
STEP 5. DISCARD ROTTEN OR SPOILED FOOD
The best way to prevent spoilage is to not let food sit for too long before eating it. The amount of time varies depending on the food and how perishable it is. If you see that any food items, like produce, have spoiled, throw them away immediately.
Learn effective ways to remove stubborn odours from your refrigerator.
EXPLORE POPULAR KITCHENAID® REFRIGERATORS
KitchenAid® Refrigerators are adept at maintaining the correct temperature for your ingredients, in addition to helping ensure that everything is kept cool and accessible for your next creative inspiration. Shop for a new refrigerator today and explore impressive features like the Preserva® Food Care System, which utilizes two independent cooling systems and the Produce Preserver, which can help keep food at its peak.
WAS THIS ARTICLE HELPFUL? PASS IT ON
LEARN MORE APPLIANCE CLEANING TIPS WITH KITCHENAID BRAND
-
 Ceramic Cooktops Explained Learn more about ceramic cooktops along with the pros and cons and how to clean them.
 -
 Guide to Clean Stainless Steel Appliances Learn the best way to clean stainless steel and black stainless appliances. These steps can help remove fingerprints from refrigerator doors, stoves and more.
 -
 Step-by-Step Guide to Cleaning a Dishwasher Only 5 steps to clean your dishwasher. Learn how to clean empty & full dishwashers & how using affresh® dishwasher cleaner once a month can make it spotless.
